This article explains how to create, setup and manage your ManageMore Cloud Saas Server with the V2 Cloud Provider. This will allow you to run a multi-user ManageMore Business Software License from any computer (Windows or Mac) without needing your own network infrastructure or server.
Step 1 – Sign Up for a Cloud Server with V2 Cloud
To sign up for a V2 Cloud Server, click this link. You will be directed to the V2 Cloud website. Click on the “Start 7-Day Risk Free Trial” button to select a plan and configure your new cloud server.
Note: This service is provided by a third party, V2 Cloud Solutions, LLC., which is not controlled or operated by Intellisoft Solutions, Inc. (ManageMore) Pricing, configurations, and offerings are subject change by the third party service provider.
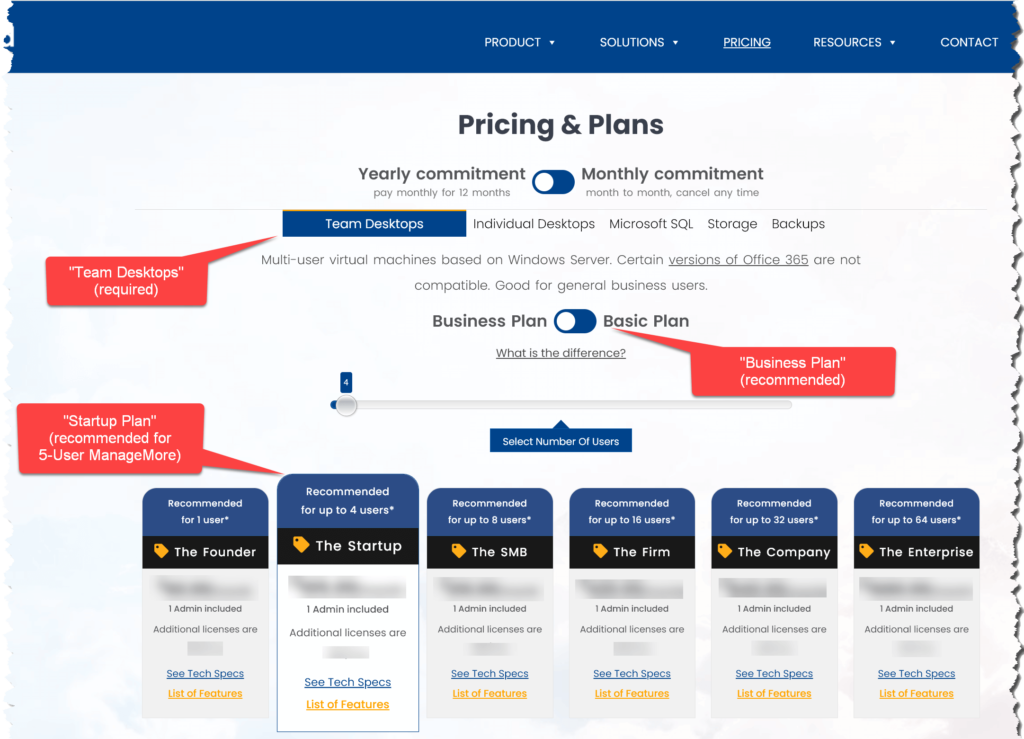
When selecting your server plan, you will need to choose Team Desktops, to allow multiple users to log into the same server. We recommend that you choose a Business Plan since this provides you with an automatic daily backup of your server and free antivirus protection. You will also need to select the server type, depending upon the number of users that will be logging into your server. We recommend The Startup server plan for a 5-User ManageMore license.
Step 2 – Managing Your Server
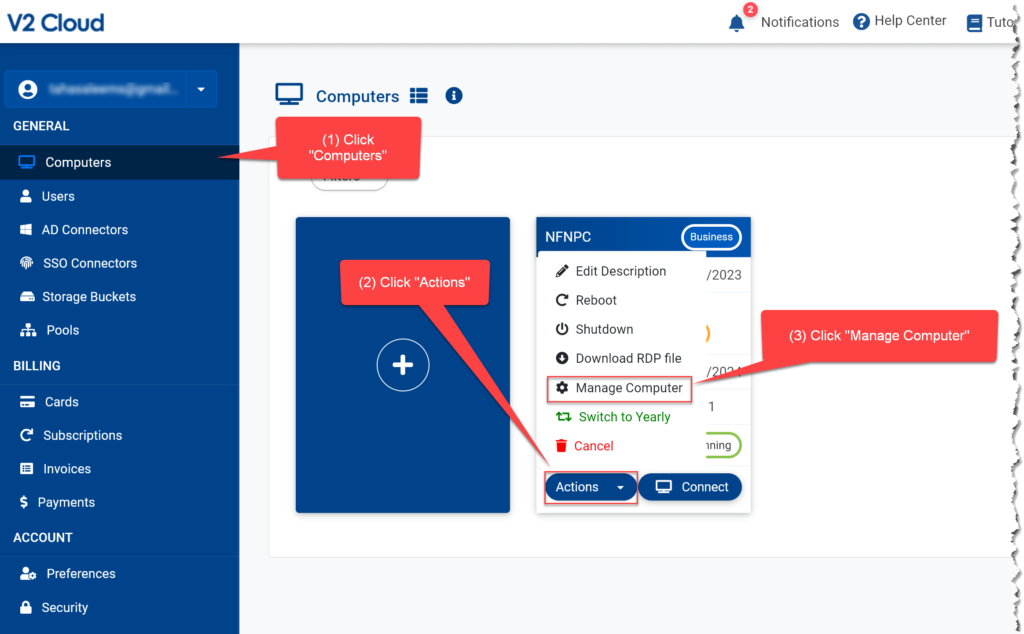
Once you have signed up for your server, you will be directed to the Server Management page. To get back to this page, you can log into the V2 Cloud website at any time, using your email address and password. From this page, you can manage your server and add users as necessary. First, click on “Computers.” Then, click on the “Actions” button to bring up the menu. Finally, click on “Manage Computer” to get to the Computer Management page.
Step 3 – Forwarding a Port to use RDP directly
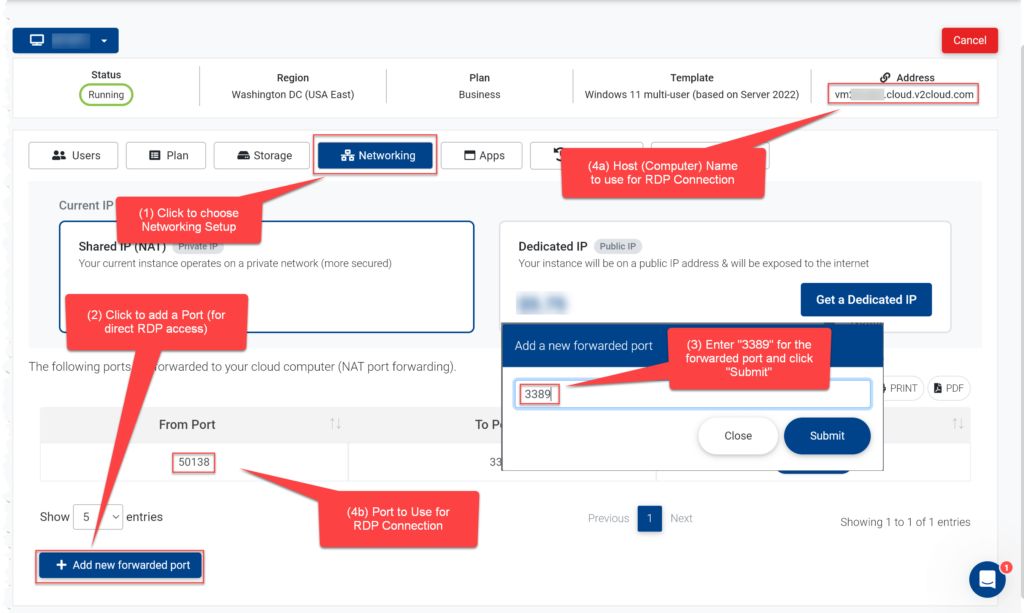
Although you can download and use the V2 Cloud software to login to your server, we recommend that you use Microsoft Remote Desktop client directly for best results. To do this, you will need to create a Forwarded Port on your cloud server. First, select “Networking” from the Manage Server screen. Then, click on “Add a new forwarded port.” Next, enter 3389 for the port to forward. The system will then show you the Computer Name to be used and will randomly assign and create a forwarded port to use for your server.
Step 4 – Creating Users on your Server
The next step is to add users to your cloud server. To do this, select Add new user access from the Manage Server page.
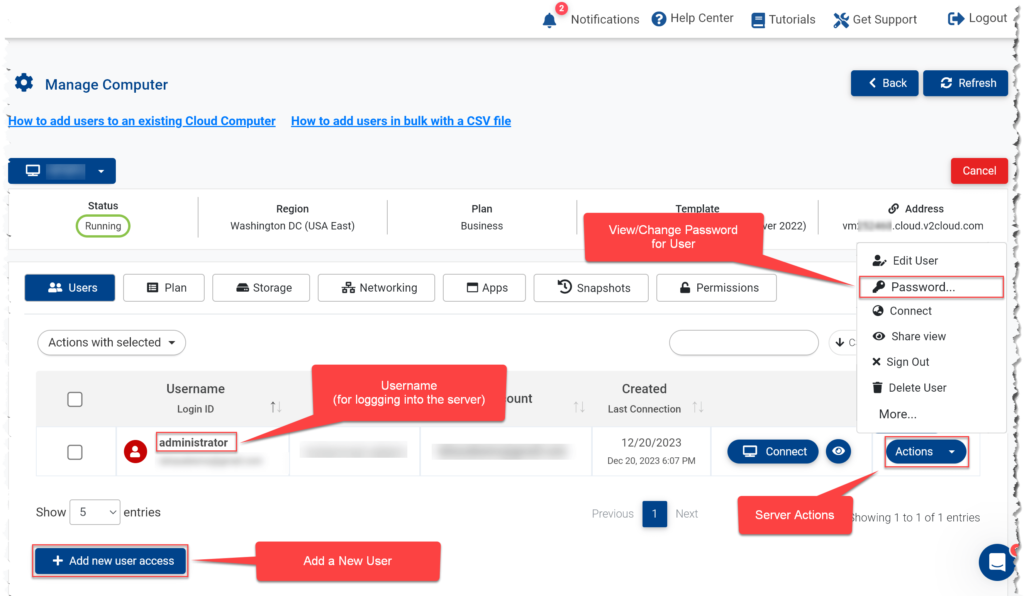
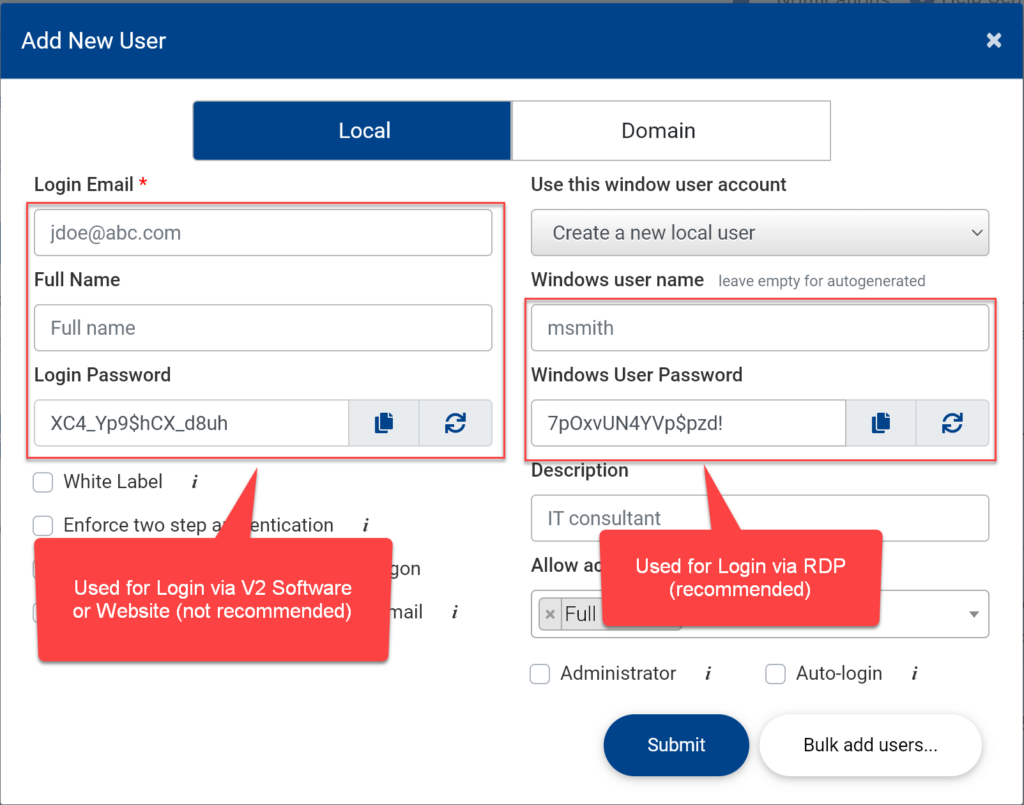
You will be prompted to enter an email address, password for logging into the V2 Cloud software. You will also provide a username, and OS password to log into the server using the RDP Client.
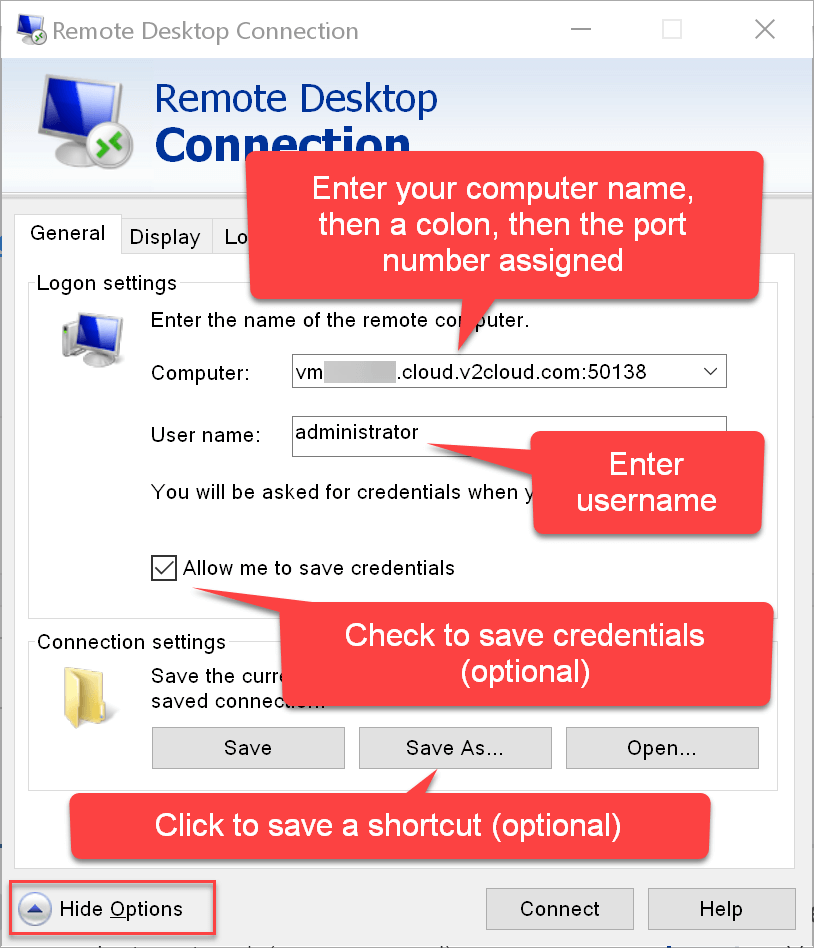
Step 5 – Logging Into your server using Microsoft RDP
To log into your server, we recommend that you use the Microsoft Remote Desktop client. This program comes pre-installed on all Windows computers. It is available on other platforms (e.g. Mac) as a free download from the Apple Store (search for Microsoft Remote Desktop for Mac). Run the RDP client application, and provide your computer name and forwarded port (from step 3 above). Enter your user name and password (from step 4 above). You can optionally choose to save the login credentials on your device and/or save a shortcut to your device desktop.