In this article, we will show you how to install the ManageMore Connector Plug-in for WordPress and WooCommerce. This plug-in allows you to link your ManageMore Business Software with the popular WooCommerce shopping cart for WordPress. Once linked, you can update your customers and products directly from your ManageMore database, and automatically retrieve orders into ManageMore when they are placed on your website.
Note: The ManageMore Connector plug-in requires the free WooCommerce plug-in from Automattic, Inc. You must install WooCommerce before adding the ManageMore Connector plug-in. The plug-in also requires the eConnect Cart module.
Step 1 – Download the Latest Connector Plug-in
The ManageMore Connector plu-gin is hosted on our private servers, and is therefore not available on the WordPress.org site. To download the latest plug-in, click on the link below.
ManageMore Connector Plug-in Download
Step 2 – Install and Activate the Plug-in on your WordPress Site
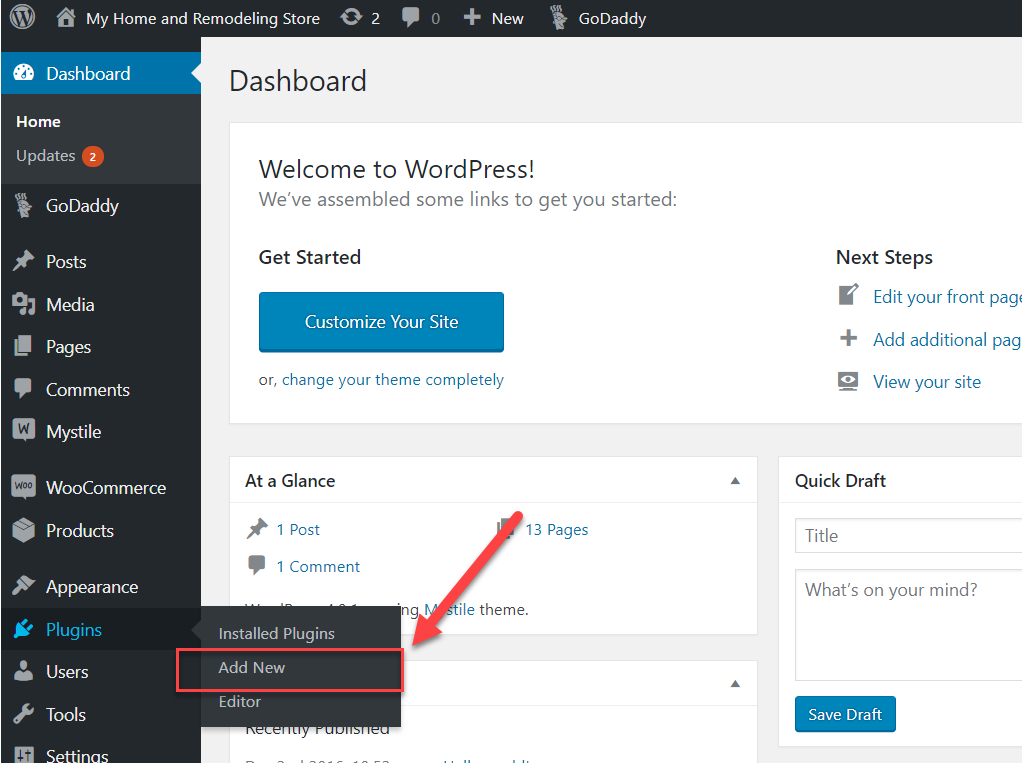
First, log into your WordPress Adminstration panel. This is usually located at www.yoursite.com/wp-admin. To add the ManageMore eConnect Plug-In, select Plug-ins … Add New from the WordPress from the menu on the left.
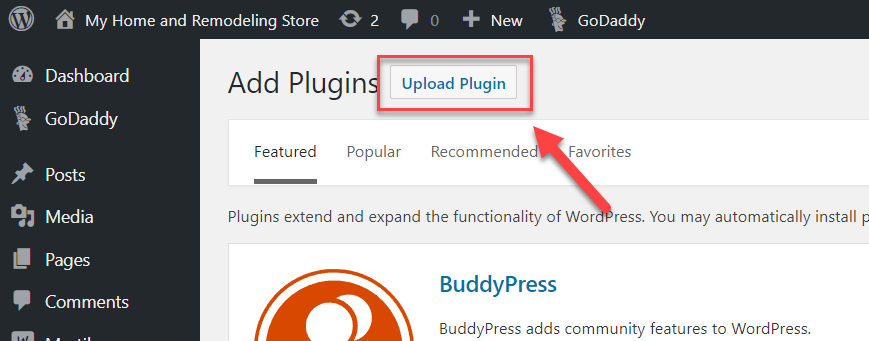
On the Add Plug-ins page, click on the Upload Plug-in button.
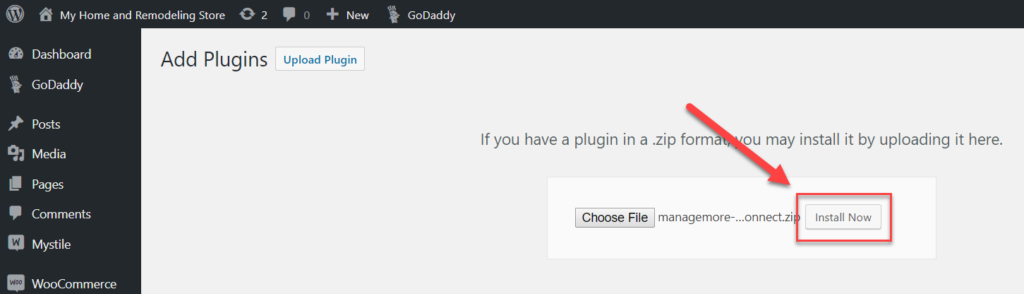
Then click on the Choose File button to select the file you downloaded in Step 1 (managemore-econnect.zip).

After choosing the file (managemore-connector.zip), click on the Install Now button to install the plugin.
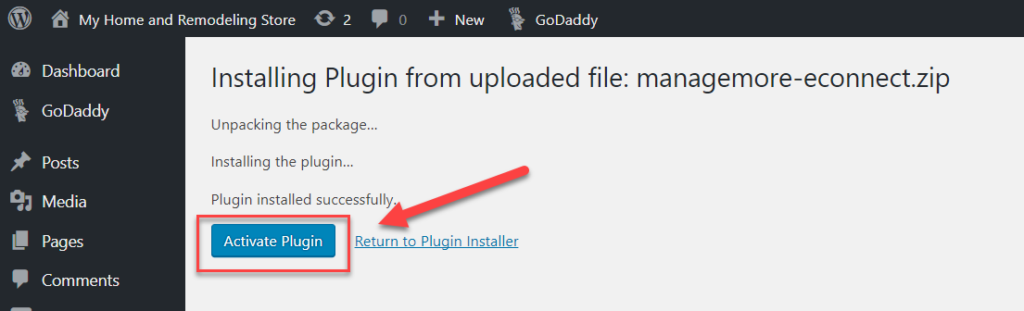
After the installation is complete, click on the Activate Plug-in button to complete the activation process.
Step 3 – Configure Plug-in Settings
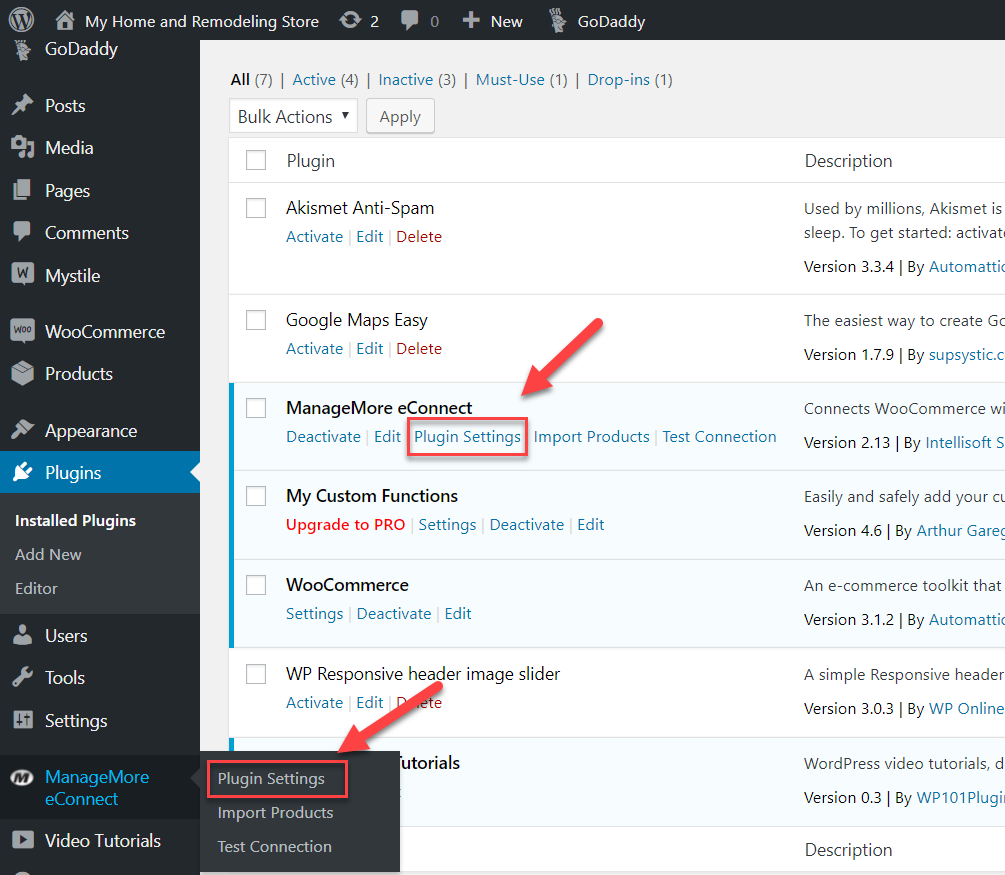
The next step in utilizing the ManageMore eConnect plug-in is to configure the plug-in settings. To navigate to the plug-in settings, select ManageMore eConnect … Plug-in Settings from the left hand menu, or click on the Plug-in Settings link on the ManageMore eConnect Plug-in entry on the Installed Plug-ins page.
Step 4 – Activate and Configure the Payment Gateway
If you are using ManageMore’s Intellicharge Credit Card Processing, you must activate one of the included Payment Gateways. The Payment Gateway serves two functions. First, it obtains a card approval from the Merchant Processor. Second, if the transaction is approved, the Payment Gateway completes the order and marks it as “Processing”. In the case of the On Account method, there is no credit card entered and no approval obtained, it only completes the order.
To obtain a FREE, no obligation quote for a merchant account that works with eConnect, please complete the Request for Credit Card Merchant Account form.
Select one of the links on the bottom of the Plug-in Settings page to configure your Payment Gateway. You can also directly select the Checkout tab in the WooCommerce settings, where the gateways are located. For this lesson, we will configure the TSYS Payment Gateway.
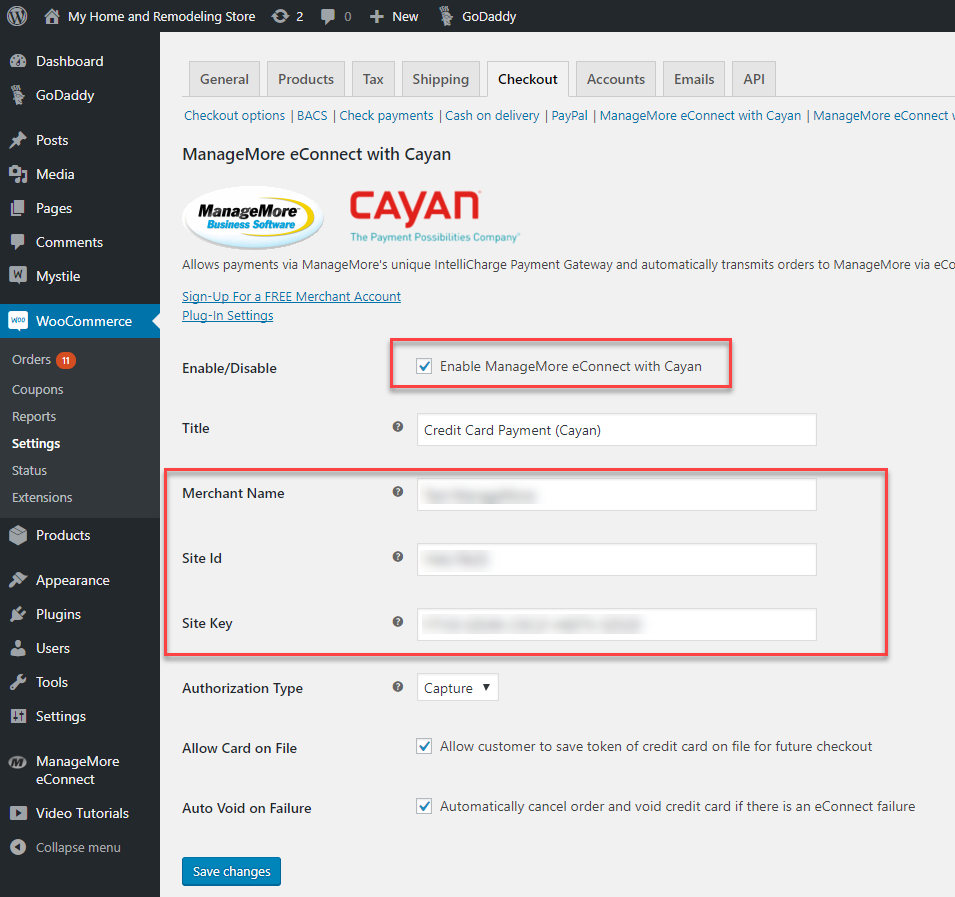
Enter the credentials for your merchant account that were provided to you by the payment processor. Be sure to check the option at the top to Enable the particular payment gateway. Depending on the gateway, there may be other options available. The most important of these options is whether to immediately charge the card (Capture) or to obtain an Pre-Authorization only, in which case the capture is performed in ManageMore when the order is shipped.
Be sure to click Save Changes when complete.
Step 5 – Updating Your Plug-in
To update your ManageMore Connector Plug-in, follow the normal steps to update a plug-in on WordPress. Simply visit the Plug-ins section of your WordPress Admin Panel, and click the “Update Now” option on the ManageMore Connector item, if available.

Related Topics